Best Alternator Swap Yet!
Last
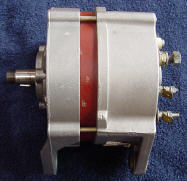
year, we documented the swap of a Nippondenso
alternator for the stock reverse-mount Lucas unit on S2 cars. I came
across a Bosch alternator that makes for a significantly simpler and more
powerful swap. It's a 90 amp alternator from an '88-92 XJ6, Lester# 13247.
This particular alternator had been rebuilt by Lucas (A2515) and possibly
misidentified as an XJ6 alternator. The alternator has a W~ connector,
which doesn't appear on the XJ6 schematic. I'll give instructions for connecting
an alternator with or without this connector. Instructions apply to E-Types
with reverse mounted alternators. This alternator can also replace forward
mounted alternators, by using a regular clockwise fan.
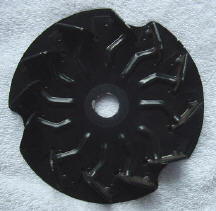
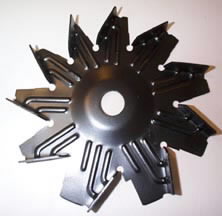
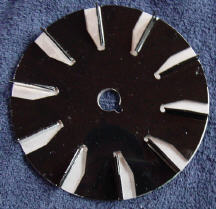
As was discussed in the Nippondenso article, the Lucas alternator had several unique features:
Automotive
alternators are designed with the diodes located in the rear (not
the pulley end). The reason is that semiconductors can be damaged by heat,
and there's more room in the back for heat sinks and such. To ensure proper
cooling, the fan is usually mounted near the pulley, and it's designed
to pull air from back to front, so that the cool air hits the critical
diodes first. The fan is usually clocked to maximize airflow. If you
simply turn an alternator around backwards (pulley facing the engine),
it will spin counter clockwise, and the fan will pull less air. A 90 amp
alternator produces about as much heat as five light bulbs, so the air
hitting the diodes would be hot. Series II and III E-Types had reverse
mounted alternators. To accommodate this, the fans are designed to rotate
counter clockwise. Here's a comparison of CW and CCW fans:
The Bosch alternator usually comes with a clockwise fan. This should be discarded and replaced with an omnidirectional fan or CCW fan. I used an omnidirectional Prestolite (Electrosystems) part #90-2241. These are common aircraft components which can be obtained at reasonable cost. If you don't have a local aircraft supply house, try Flying Colors Air Parts. The Prestolite fan includes an aluminum baffle. Another option, with possibly greater availability is Bosch part#1126610046, which is a CCW fan. It can be obtained through automotive electrical rebuilders or from Summit Racing. (Note: these fans CANNOT replace the fan on a stock Lucas alternator. The hole is 17mm, while the Lucas shaft is 5/8") If you're trying to replace a regular forward mounted alternator, the XJ6 stock fan is fine.
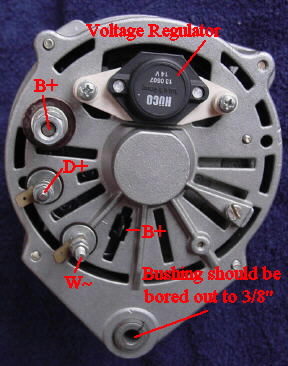
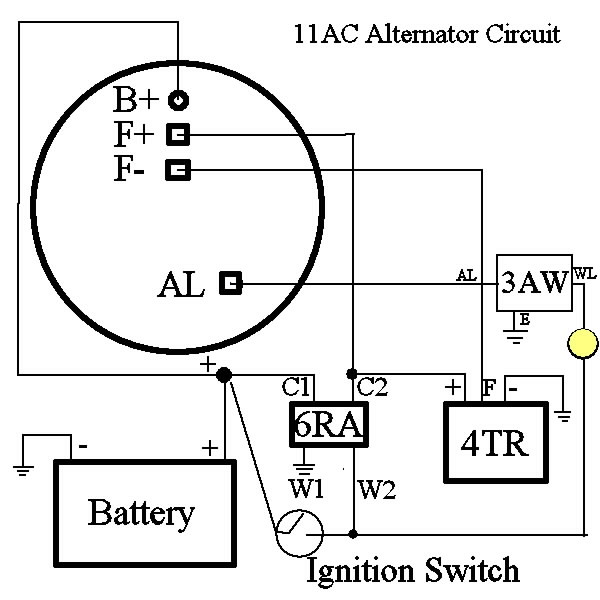
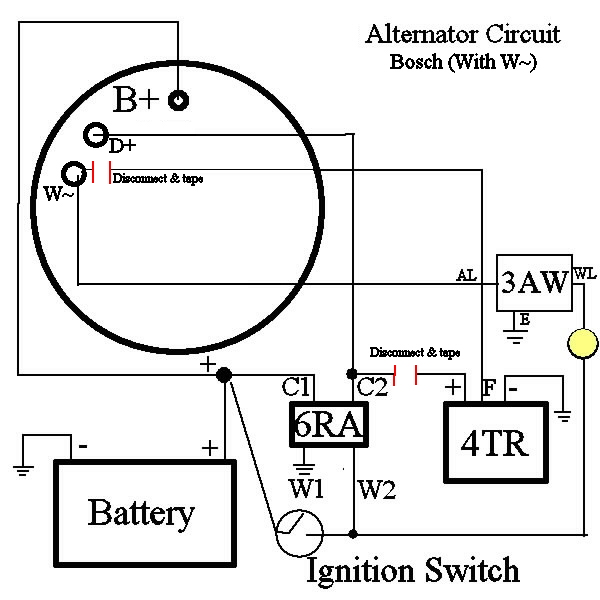
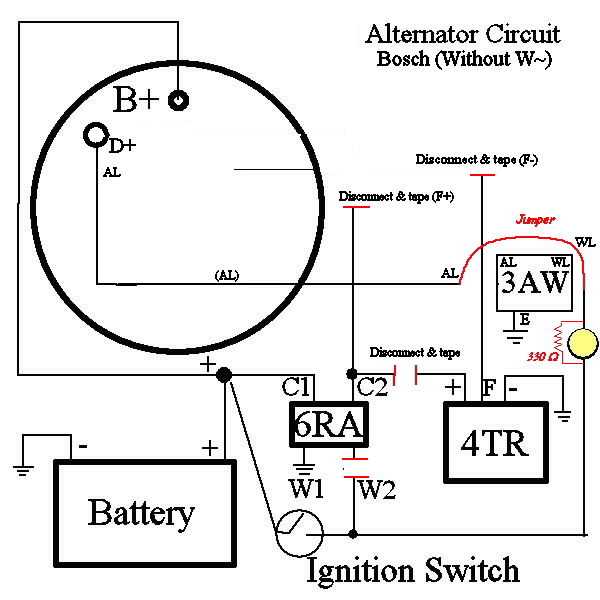
The Bosch alternator has a very adaptable wiring plan.. It has a large B+ terminal for the battery connection. The D+ lead is used for the warning light in it's original environment, but we'll simply connect the F+ lead in an E-Type. The small B+ lead is for a filter capacitor, which can be mounted to the case with the screw on the right. It has a connection (W~) which is similar to the AL lead on the Lucas alternator. From the viewpoint of the 3AW relay, it's an AL lead which can be used to control the ignition light in the dash. Naturally, we recommend replacing your 3AW with one of our solid state units. When installing a larger alternator, it's important to think about whether the wiring can take the extra load. The key issue is the wire between the alternator B+ terminal and the battery. I ran a second 10 gauge wire, leaving the original wiring in place. Alternatively, you could run a single 6 gauge cable and replace the original wire entirely. The pulley is a single V pulley, 2.75" in diameter. A local alternator shop or junk yard should be able to supply something suitable. The pulley from a Delco 10SI should be just about right. You can find one at Quick Start. It will be necessary to cut a groove for the Woodruff key on the Delco pulley. The original
and modified circuits look like this:
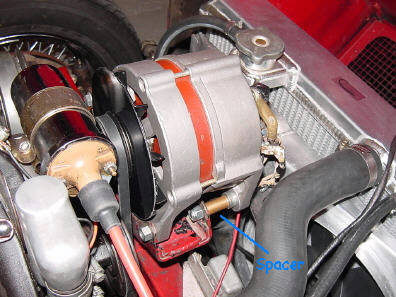
The physical
installation of the alternator is straight forward, although some light
machine work is needed to make it work. Since the Lucas mount is different,
a spacer needs to be fabricated to attach the alternator to the bracket.
Simply cut one out of 3/8" pipe, available in any plumbing shop. The spacer
is 1 1/4" long. Since the alternator is designed to mount on a 8mm
bolt, you need to bore out the bushings to 3/8" to accommodate a larger
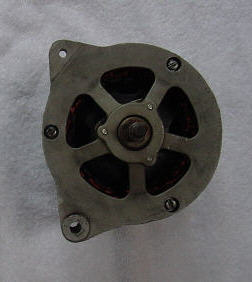
bolt. Drive the bushing out of the alternator, don't risk iron filings
getting into the core! Two bolts, rather than one, are used to secure the
alternator to the mount.
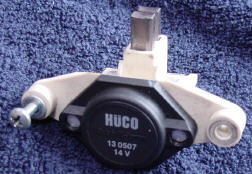
One of the big advantages of the Bosch alternator is ease of repair. The Voltage Regulator and brushes are packed together, and can be replaced with a screwdriver in five minutes. This style of alternator has been used on millions of cars since the 1970's, the regulators all interchange.
Copyright
© 2005 CoolCat Express Corp. All Rights Reserved. Linked vendors have
no relationship to CoolCat Express. While every effort has been made to
make these instructions accurate, CoolCat makes no warranty for the reader's
own work.
|
|||||||||||||||||||||||||