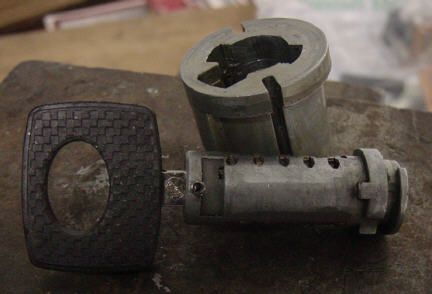
The lock cylinder on my 190D was becoming balky. From time to time, it would be impossible to turn it. Then it would release and be ok for a while. If the lock cylinder ever totally failed to release, it would be a two day repair job to drop the column, remove the lock, muscle out the cylinder, and replace the assembly. So I replaced the cylinder to save myself future grief. The new cylinder cost $90 from the local Mercedes dealer. A fifteen minute repair, which saved hours of aggravation later. Later, I fiddled with the old cylinder. A couple of turns of the key, and it locked up solid, I would have been stuck after just a couple of more starts!
Once the repair was complete, I became curious as to whether the old cylinder could be salvaged. I disassembled it, and repaired it. Had I done this originally, I could have saved the $90 replacement cost. Given the potentially disastrous consequences, I'd recommend that if you have around 100K miles on your car, it's worth doing this procedure as a preventative maintenance task. The problem is caused by gradual wear, so you can head it off if you act early. Here's how to do it. (If your lock is already stuck, it's too late for you: there's no option but to open the steering column, and do it the hard way!)
BTW, if you find an old cylinder in the junk yard, you can use this procedure to rekey it for your own key!
First step
I'm assuming you already know how
to remove the cylinder. If not, the procedure is documented in the shop
manual. There are a lot of little parts and springs in a lock cylinder,
so work slowly and don't let anything fly. It's a good idea to do the work
in a large plastic bucket if you are unfamiliar with the process. That
way, anything that flies or falls will end up contained in the bucket.
Note that it's especially important not to let the tumblers get mixed up,
or you will have to sort them to match your key! Don't be intimidated by
all of this: the lock mechanism has a lot of grease and dirt, so friction
tends to keep everything in place.
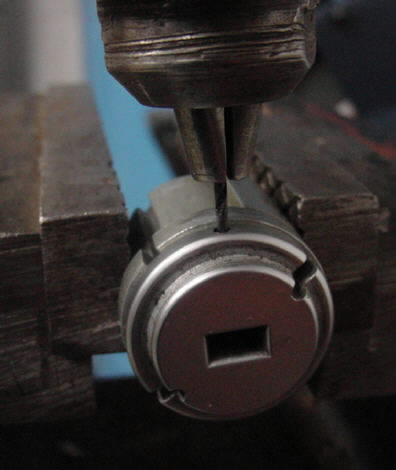
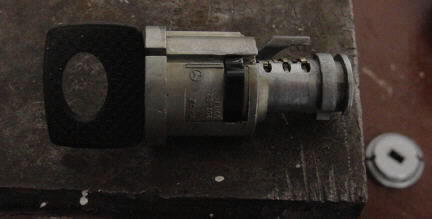
Chuck the cylinder in a vice. There is a roll pin which holds the assembly together. Drill this out, taking care to keep the drill perpendicular to the work. Use a 1/16" drill:
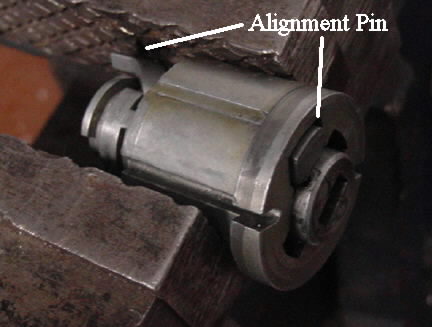
With the roll pin removed, the face plate will easily pry off. There is a steel alignment pin which passes through the entire length of the cylinder. Note it's position for reassembly:
Second Step
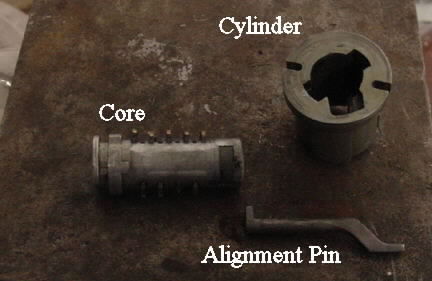
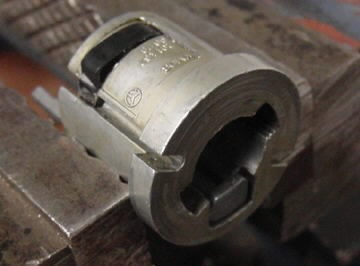
With the cylinder in a bucket,
the core is simply pushed out of the cylinder. It may stick a bit, but
it will push through. Work slowly to keep the tumblers from popping out.
The steel alignment pin will simply fall out once the core is clear. When
it's disassembled, it will look like this:
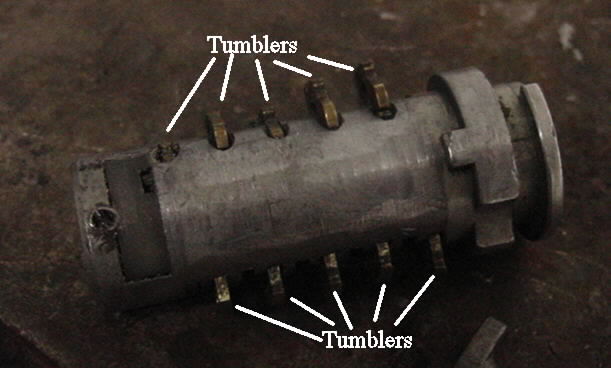
Observe the core. DO NOT remove the tumblers. There is no need, and if you put them in our of order, your key won't work! You will probably find that they are stuck with years of grease and grime, let it be for now. The lock can be soaked in solvent AFTER you reassemble. For now, the dirt will help you keep everything under control. There are ten tumblers in the core, each one is roughly rectangular and passes through the whole core. If you were to remove one, you would find that there are tiny springs which keep them supported. Obviously, you don't want to lose these components, so work slowly.
Third Step
Insert your key into the core. This may take some
fiddling, as the tumblers have to pass through the whole core: push the
key through one tumbler at a time, make sure that tumbler is passing through
the core, and keep pushing.
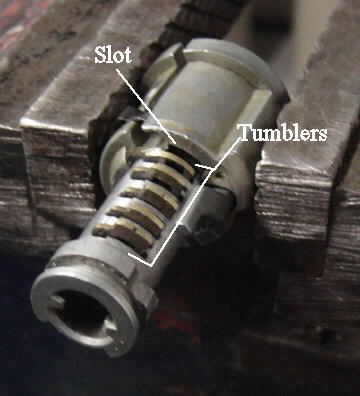
Here's the crux of the whole problem. If you observe the image above, you will see that with the key inserted, all the tumblers are just flush with the surface of the core. This is what allows the core to turn freely. When a tumbler becomes worn, it will extend above the core and eventually engage the slot in the cylinder. This will keep the core from being turned! If you find that any tumbler is proud of the core, simply use a file or grinder to correct it's height:
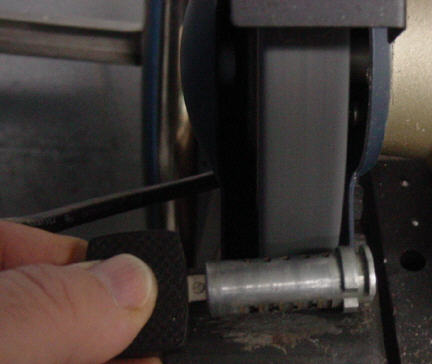
Take care not to remove too much metal from the core. Use a light touch! But keep at it until the tumblers are all flush with the key inserted.
Fourth Step
Chuck the cylinder in a vice. Lay the alignment pin in place (cylinder reversed to make position of pin more clear):
Now begin inserting the core from the rear of the cylinder. Note that tumblers must align with the slot in the cylinder. Apply gentle pressure to push core in. You will find that you have to pause to worry each tumbler into place:
When you are about halfway in, you can insert the key. This will draw in all the tumblers and make insertion much easier:
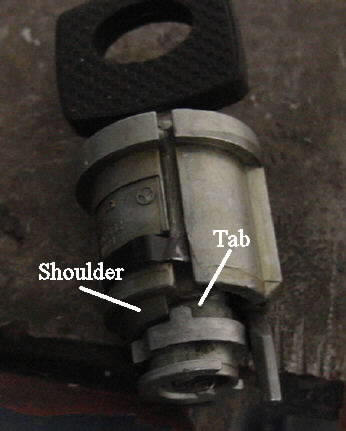
Before the core is fully seated, rotate it so that the tab on the core is aligned with the shoulder on the cylinder. If you do not do this, you will not be able to rotate the cylinder after it's assembled. :
Final Step
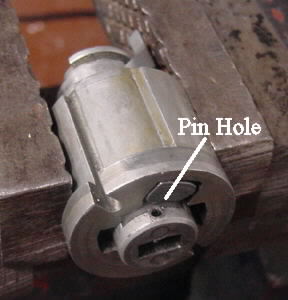
Chuck the cylinder back in your vice, with the pin hole up:
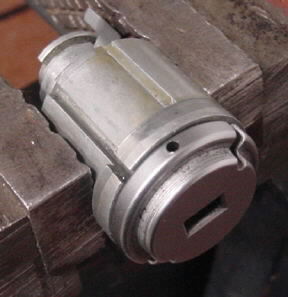
Install face plate, aligning the holes. Use a new roll pin to fasten. The original roll pin is probably 1.75 or 2MM. A 1/16" roll pin may work. Alternatively, you can use a steel taper pin. It's best to have the key in the cylinder while you insert the pin: if the pin extends into the keyhole, you will have to drill it out and start again!!
Test for smooth operation. Key should turn freely. Once you are satisfied, soak the lock cylinder in solvent, blow it dry, and apply a few drops of sewing machine oil. You should be good for another 100K miles or so!
Copyright©2003 Michael Frank