| So the door locks on your
W201 are getting sticky. Maybe you've reached the point where you can't
turn the key. Here is what to do if your door lock cylinder needs to be
rebuilt. If you do this well, you can save the cost of a new lock. One
warning, though: locksmithing is delicate work, don't blame me if you make
a mistake.
Before I start, there are three possible reasons why your key won't turn. The first is that the vacuum pod which actuates the central locking mechanism is misadjusted. I don't think this can happen spontaneously, and if you've been fooling with the door mechanism, then you know what you've done and I can't help you. It may be that the mechanism itself is jammed, in which case you will need to replace it and I can't help you. However, the most common reason for the "key not turning" problem is that the cylinder has worn and the pins aren't disengaging. Here's how to fix that: Removal
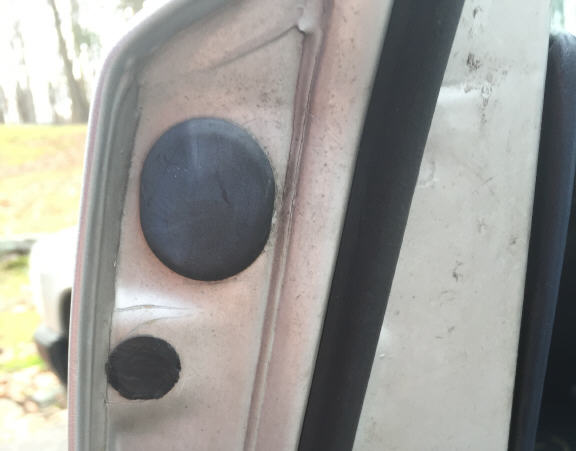
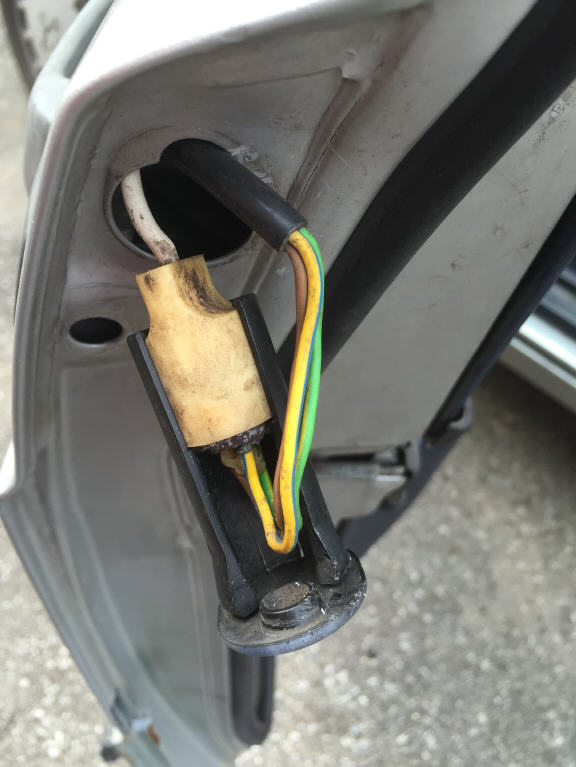
Begin by finding the two plugs
in the side of your door. (If you don't have an alarm system, then you'll
only find the small plug.) The wiring for the alarm will come out with
the large plug. This is a poor quality connector and usually brittle with
age and weather, take care not to damage the soft rubber part when you
unplug it, as it's hard to replace.
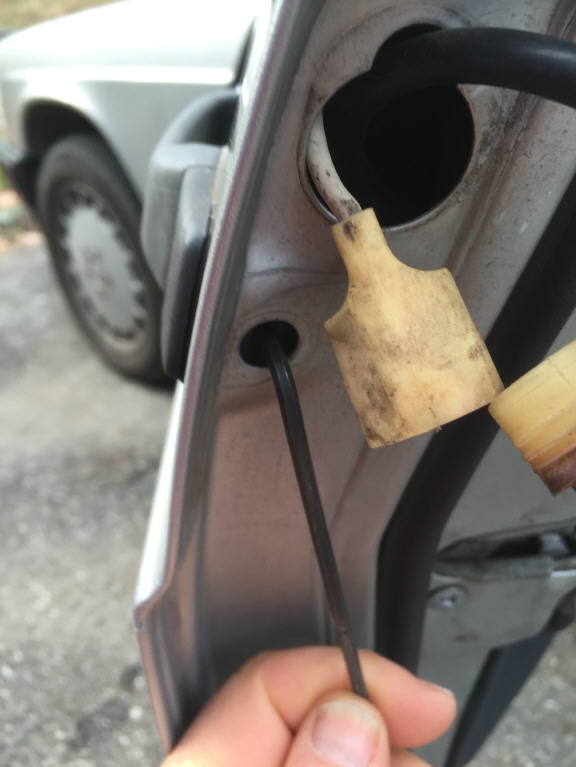
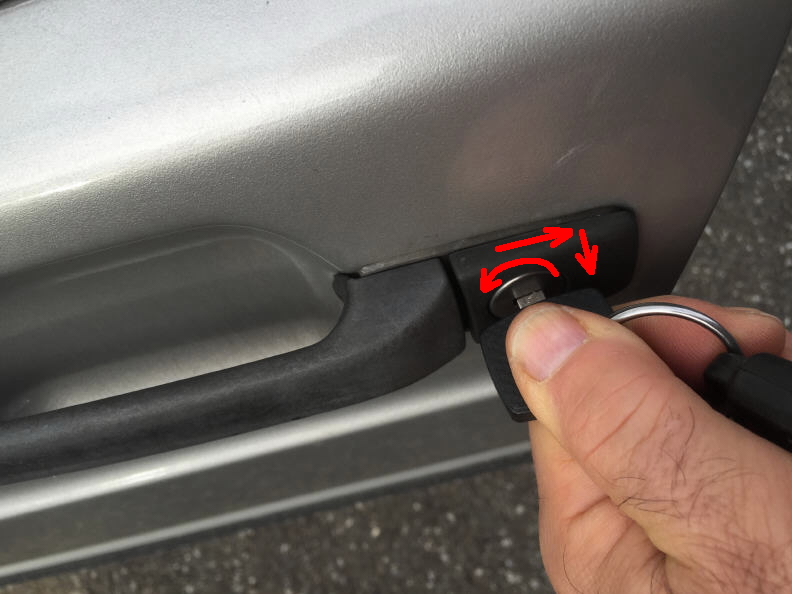
Next, insert a 3mm Allen wrench into the smaller hole and undo the grub screw about 3 turns. Do not back it all the way out, do not remove it from the door. Turn the key as if you were opening the door, and simultaneously push the cylinder back towards the edge of the door. It should slide back away the handle. If it doesn't go back far enough, undo the grub screw a bit more. Once it slides back, pull it straight out of the door and work the alarm wire out with it. What if the key won't turn? It will. Move it up and down as you try to rotate, and it will eventually slip free, once it does, don't let it go back until you have the lock out of the door, or you'll be stuck again. If you absolutely can't get the key to turn, your lock is toast and will need to be drilled out and replaced. So keep trying until you find the groove. Disassembly and adjustment
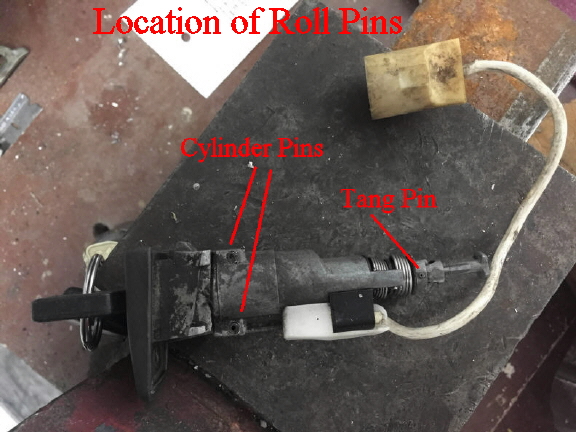
The lock is held together with roll pins, which can be easily driven out with a punch or even a suitably sized nail. The small pin on the end holds the tang: if you find you can turn the lock, but nothing happens, it's probably a broken tang. The tangs are being reproduced, search E-Bay for them. We won't have to remove the tang to repair the cylinder, so leave that pin in place. For the present project, we're
going to separate the cylinder from the body of the lock by driving out
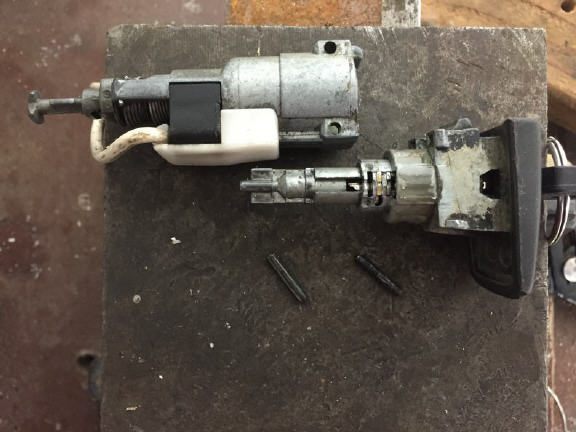
the two large roll pins. Keep the key inserted in the lock at this time
to keep the internal lock pins from disappearing. Once the two roll pins
have been removed, the two sections just pull apart. Again, keep that key
fully inserted.
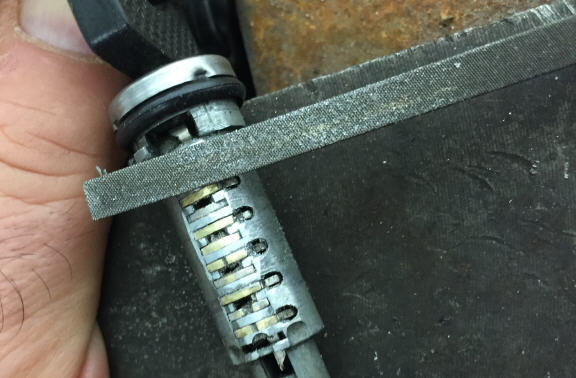
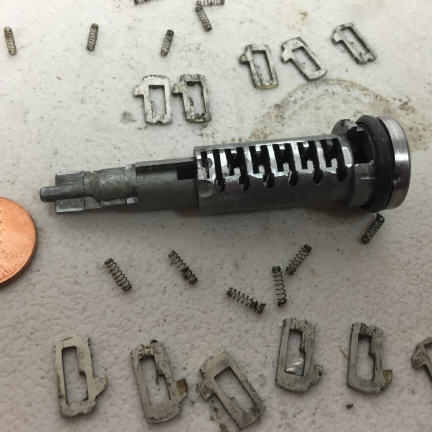
Remember, keep that key fully inserted. To remove the cylinder, just turn the key while pushing on the end of the cylinder. There is one position where it will just slide out of the shell. There are twelve lock pins in this cylinder, six on the top and six on the bottom. With the key inserted, the pins should be flush with the cylinder. If they protrude, the lock will stick when you try to turn it. To correct this, simply file or grind them until they're flush. Once this is done, you can say goodbye to sticky door locks. Cleaning. If you aren't experienced with
locksmithing or watchmaking, the thing to do now is to spray everything
with brake cleaner, keeping the key fully inserted. Use a cleaner with
an extension tube, and force the fluid through with concentrated pressure.
This will flush out most of the dirt and old grease. Then skip down to
"reassembly." If you want to do a little better and you
have tweezers and an ultrasonic cleaner, read on.
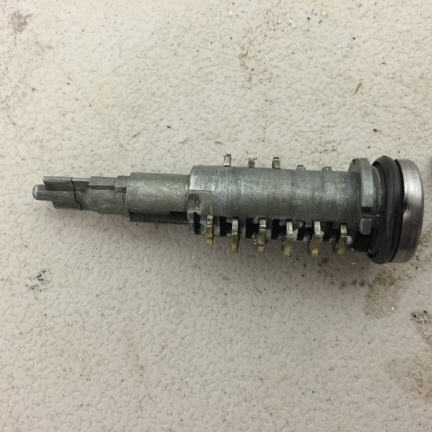
Slowly remove the key. If you do it carefully, the pins
will extend about half way and everything will be under control. If you
whip the key out quickly, the parts go all over the place. You can see
how many parts are involved and how small they are from the photo. Do not
make any attempt to remove the stainless steel door that covers the key
opening. Slowly and carefully, remove the pins and springs with your tweezers.
The springs like to be mobile, so be sure you keep them under control.
AFAIK, there are no replacement parts available, so if you lose anything,
you will need to take apart another lock for donor parts.
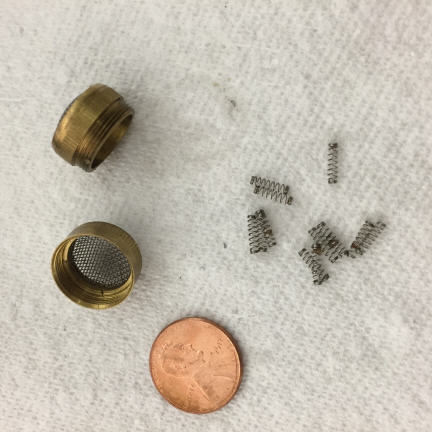
Each pin is numbered. If you keep track of which number goes in which position, it helps reassembly. Otherwise, it's going to be a lot of trial and error. The most thorough way to clean these parts is in an ultrasonic cleaner. Use a wire mesh basket to control the springs, if you have one. Reassembly Lubrication of door locks is a bit problematic. The cylinder is a dead end, so anything that goes in, stays there. Oil, grease, dirt, sand, water, graphite, anything. For that reason, it may be best to leave everything dry and clean. Because a door lock is more or less exposed to weather, a dry silicone lubricant is a good bet if you aren't comfortable leaving it dry. Liquid oil on outside locks is just asking for problems. Insert the key into the cylinder if you've removed it. You will have to manually compress the pins if you've done this. Insert the cylinder into the housing and twist the key to fully seat it. To keep it from coming out again, rotate the key 180 degrees once it's seated. Make sure that it doesn't pull out of the shell when you move the key to the open or close position. Then just mate the two halves of the lock and fasten them together with the two roll pins. The old pins can be reused. Installation of the lock assembly into the door is the reverse of removal.
|
||||||||||||
| Copyright©2015 Michael Frank |